 Halloween is over so naturally it's time to finish up writing about sewing costumes. A fat lot of help that will do anybody. Oh well. Such is life.
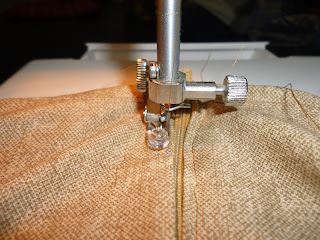
Zippers. It's amazing how people are afraid of zippers. It's only been in the last year or two that my wife has been willing to sew them on herself, and she's pretty darn good with a machine. They're not really hard though, as long as you have a zipper foot. A normal sewing machine foot is symmetric about the needle. It has area on both sides of the needle. This wouldn't work with a zipper because when you sew on one side of the zipper you'd have part of your foot running over the zipper itself. To solve this dilemma you might think that it would be good to just hack off the half of your foot that's running into the zipper and this is exactly what a zipper foot does. They's also usually set up so that you can swap the foot to either the left or the right side of the needle which give you the freedom to sew in whatever direction you want.
Click through the jump to watch me sew in a zipper and do the final hemming of the tunic.
 |
| Tunic split down the back with the zipper I bought. |
 |
| Using the zipper for reference, sew the back closed as far as you need to so you have a gap for the zipper. Press everything flat. It makes it easier. |
 |
| Now put on your zipper foot. Pin the tunic to the zipper. You want the fold of the fabric to come right to the midpoint of the zipper. Now just sew. It's that easy. |
 |
| Make a couple of runs across the bottom to reinforce the zipper and tunic. |
 |
| Perfect-ish! Had I done a better job the zipper would be hidden. Instead I used her hair to cover it. Works just as well. Yay long hair! |
 |
| The sleeves and bottom need to be hemmed and it's best to check length while trying it on. This needed to be long enough to tuck under the bracers but not so long as to peek out the bottom. |
 |
| Quick hem. Nothing fancy. |
 |
| Finished product. Very simple. Ready for accessories! |
 |
| Add bracers, greaves, a belt, a pouch, a sword and a pelt of a freshly killed badger and you have your warrior. Awesome. |

No comments:
Post a Comment